Know Your Techniques: Solutions

Making solutions seems like a simple process—dissolve a solute in a solvent. But then you try to do it, and things get complicated. You may find yourself asking: Do I have the right concentration? How do I do a dilution? How much do I need? Am I using the right equipment?
Since any good chemist needs to have all the solutions (pause for laughter… nothing? Really? Oh, well.), here are some tips for nailing your solution preparation every time.
Know what your concentration means
There are many ways to measure and report concentration. Start by making sure you understand the one you are using, what it means, and how to measure it. Here are some commonly used concentration units:
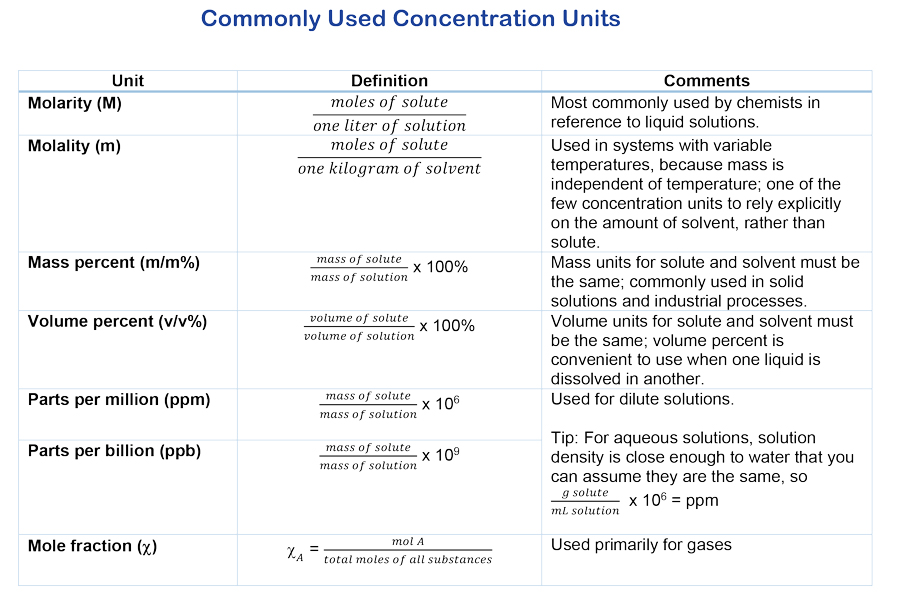
So, if your concentration is measured in molarity, you need to know the moles of solute and volume of solution. But a v/v% requires volume measurements only. Knowing the type of concentration you are working with will help you choose the right equipment.
Use the right equipment
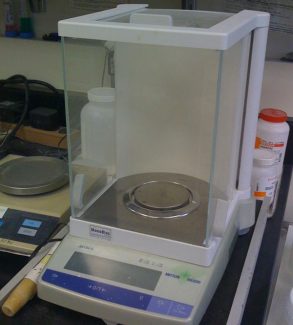
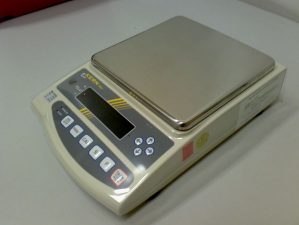
Lab equipment is where all your professor’s talk of significant figures comes into play. Most types of equipment are calibrated to a certain level of accuracy, which you can see easily. For example, your top-loading balance can measure masses down to 0.01 g, while your analytical balance measures down to 0.00001 g. So, if you need 0.0200 g of something (measured to three significant figures), use the analytical balance.
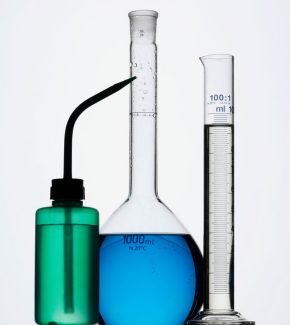
The same is true for volumes. Volumetric flasks and pipets are typically calibrated to 0.01 mL, while graduated cylinders are calibrated to 0.1 mL. Eppendorf pipets are great for very tiny volumes, but they are expensive. You are better off diluting solutions rather than preparing a solution with very small quantities of solute, for the most part. (The volume markings on beakers and Erlenmeyer flasks are qualitative and should never be used for actual measurements.)
Suppose you need 100.0 mL of a 0.500-M MgCl2 (magneium chloride) solution. You would use the analytical balance to weigh the MgCl2 and mix it up in a volumetric flask; you’ll actually be able to determine your concentration to four significant figures instead of three, but more accuracy is not a problem. If you need a 0.50-M MgCl2 solution (only two significant figures), a top-loading balance will suffice. (Prepare the solution in a volumetric flask anyway; graduated cylinders aren’t meant for mixing solutions.)
Either way, the calculation needed is the same:

Nail the measurements
Knowing which equipment to use is one thing. But you need to use equipment the right way to get the right concentration. Here are some tips for common equipment:
Balances (top-loading and analytical)
- Balances are sensitive to vibrations and air currents. Keep balances isolated from both and wait until the reading stabilizes before recording the mass.
- Weighing papers and boats have mass, too. Remember to zero (tare) your weighing paper or boat on the balance before adding the substance you are weighing. Alternatively, you can record the mass of the weighing paper/boat and subtract it from the total mass later.
- Those tiny particles that stick to the weighing paper/boat after you dump your sample into your flask are part of the mass you just measured. They may even be too tiny to see. Use a little bit of solvent to wash them into your flask.
Volumetric flasks
- Volume and temperature changes are common when materials dissolve. To prevent the changes from messing up your solution volume, add your solute, then fill the flask ½ - ⅔ of the way with your solute and swirl until dissolved. If necessary, let the mixture sit until the solution comes to room temperature.
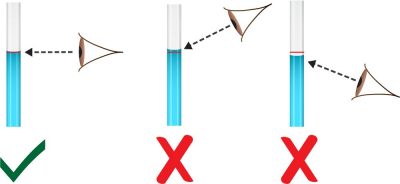
- Once the initial dissolution is complete, add solvent until the bottom of the meniscus barely touches the volume mark. Volumetric flasks are calibrated to this standard, so be as fussy as possible. Because visual perspective changes according to the position you’re in, make sure your eye is level with the meniscus.
- Firmly stopper the flask and invert multiple times (> 10) to ensure the solution is well mixed and homogeneous. When working with a solute that releases heat or gas during dissolution, you should also pause and pull out the stopper once or twice.
- Use flasks for preparing solutions only. They are not meant for transferring solutions. Just because you have 100.0 mL of solution in your flask doesn’t mean that all 100.0 mL will be released into another container. Use pipets for those measurements.
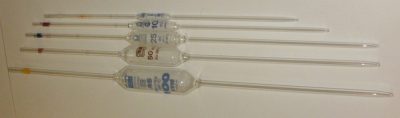
Volumetric pipets
- Volumetric pipets are calibrated for using vertically and with the bottom of the meniscus just touching the volume mark. Keep them upright and make sure your eye is level with the volume mark.
- Keep the tip of the pipet submerged in the solution the whole time to keep liquids from being sucked up into the bulb. Sucking solutions into the bulb distorts your measurement and ruins the bulb.
- Let the pipet drain into your flask. A tiny bit of solution will remain in the tip, but the pipet was calibrated with that in mind, so leave it alone.
Common equipment
Test your understanding of solution calculations and preparation with this five-question quiz. After each question, you’ll be able to review the steps needed to prepare the solution using proper lab equipment.
Take advantage of stock solutions
Stock solutions are solutions of a precise concentration that are used for dilute or frequently made solutions. Typically, you use a volumetric pipet to measure a sample of stock solution. Yes, volumetric pipets can be a pain, but they are useful. Suppose you are doing a series of experiments that require 0.0600 mol KMnO4. Would you rather weigh out 0.0003797 g of KMnO4 over and over (which you can’t do on standard lab equipment anyway), or measure out 10.00 mL of a 6.00-M KMnO4 solution?
Using stock solutions also makes it easier to handle some substances. For example, pure HCl is a gas, but it dissolves readily in water. When properly stored, its concentration will remain stable for months. Likewise, solid NaOH comes in pellets, so you can’t weigh out any amount smaller than one pellet. It is also extremely hygroscopic, which is why its mass will increase right on the balance as it absorbs water from the air. But NaOH is stable in aqueous solution.
Stock solutions are also common in biochemistry. The structure of biological molecules often depends heavily on their environment. Stock solutions of biological compounds usually include a suite of other chemicals that provide the precise environment needed to stabilize the compound.
This video illustrates techniques for solution preparation.
Source: Chemistry in Context
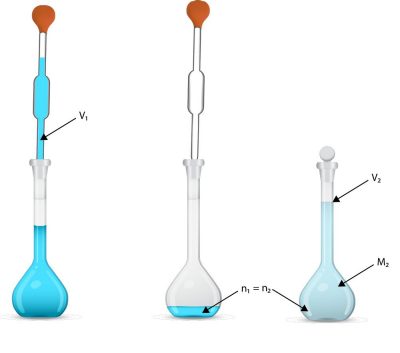
Get dilutions right
Say you need 100.0 mL of 0.500-M NaNO3 solution. Diluting a stock solution is much easier than weighing out 5.883x10⁻⁴ g NaNO3, even if you have to make the stock solution first.
First, figure out how many moles NaNO3 you need for your solution:

Then calculate the amount of stock solution that gives you 0.0500 mol NaNO3:

Now you can use your volumetric pipet to transfer 10.00 mL (0.0100 L) of stock solution to your flask, then add water until you have 100.0 mL.
The above calculation is often shortened to M1V1 = M2V2. This is a handy shortcut, but it only works if all the units are the same (so that they cancel out). Also, you have to remember what each variable stands for, so it might be easier to just do it the long way.
Why You Should Label
Always, always, always label your solutions with the concentration, contents, date, and any other relevant information. Solutions have a way of sticking around in the lab for longer than you plan, and two weeks from the time you mix them, you likely won’t remember what’s in that flask, its concentration, whether you can use it for something else, how to dispose of it, or whether it has decomposed.
Once you get the hang of solutions (and labeling them), you’ll find lab work much easier to handle.
About the Author

Blake Aronson is a program manager for ACS Student Communities. She works with undergraduate programs at two- and four-year institutions, as well as the SCI Scholars Program and other ACS initiatives.

